The Hound of the Baskervilles Chapter Summary: Complete 15-Chapter Guide
Serialized in The Strand Magazine between August 1901 and April 1902, Sir Arthur Conan Doyle’s The Hound of the Baskervilles is widely celebrated as the greatest mystery novel ever written. Marking the triumphant return of Sherlock Holmes eight years after Doyle had supposedly killed him at the Reichenbach Falls in “The Final Problem,” the novel weaves the rational, forensic brilliance of the world’s first consulting detective into the eerie, mist-choked atmosphere of Gothic horror.
Set against the treacherous peat bogs, prehistoric stone ruins, and granite tors of Dartmoor in Devonshire, the story follows Holmes and Dr. John H. Watson as they investigate the mysterious death of Sir Charles Baskerville. According to a 1742 family manuscript, a demonic, fire-breathing spectral hound has haunted the Baskerville bloodline ever since an evil ancestor committed an unspeakable crime. When giant footprints of an enormous hound are discovered near Sir Charles’s body, the incoming heir, Sir Henry Baskerville, arrives from Canada marked for death.
Whether you are preparing a paper for class, studying the mechanics of detective plotting, or revisiting Doyle’s masterpiece, this comprehensive chapter-by-chapter summary breaks down all 15 chapters in detail.
⚡ The Hound of the Baskervilles at a Glance
- Author: Sir Arthur Conan Doyle (serialized 1901–1902 in The Strand Magazine with illustrations by Sidney Paget)
- Setting: 221B Baker Street, London, and the desolate, treacherous moorland of Dartmoor, Devonshire
- Core Formula: Gothic legend investigated by rational forensic science; Watson operates as an independent field investigator for the middle third of the novel
- The Turning Point: Chapter 11, when Watson discovers the prehistoric stone hut on the tor and realizes the mysterious stranger is Sherlock Holmes
- The Climax: Chapter 14, when the glowing, phosphorus-covered hound attacks Sir Henry in the creeping fog outside Merripit House
🔍 Chapter 1: Mr. Sherlock Holmes
The novel opens in the familiar, comforting domestic surroundings of 221B Baker Street. Sherlock Holmes and Dr. Watson examine an elegant walking stick forgotten the previous evening by an unknown visitor.
Watson attempts his own deduction based on the stick’s silver band: “To James Mortimer, M.R.C.S., from his friends of the C.C.H., 1884.” Watson deduces that Mortimer is an elderly, esteemed country doctor who received the gift from a local hunt club.
Holmes playfully commends Watson for stimulating his mind, then gently deconstructs Watson’s errors:
- “C.C.H.” stands for the Charing Cross Hospital in London, where Mortimer was a young house surgeon before moving to a rural practice.
- The teeth marks on the stick indicate that Mortimer owns a dog—specifically a curly-haired spaniel, larger than a terrier.
- The heavy wear on the stick proves Mortimer walks extensive miles across rough country terrain.
Moments later, Dr. James Mortimer walks up the stairs to 221B, accompanied by a curly-haired spaniel! Mortimer is a tall, thin, eccentric physician with a passion for comparative craniology (phrenology), openly marveling at Holmes’s skull. Mortimer announces that he has come to consult Holmes on a grave, supernatural crisis.
📜 Chapter 2: The Curse of the Baskervilles
Dr. Mortimer produces an ancient, yellowed 1742 manuscript entrusted to his care by Sir Charles Baskerville before his sudden death three months earlier. The manuscript documents the family curse originating during the English Civil War:
The Legend of Hugo Baskerville
Hugo Baskerville was a wild, profane, and godless nobleman who terrorized Dartmoor. Obsessed with a virtuous yeoman’s daughter, Hugo and his debauched companions kidnapped the girl and locked her in an upper chamber at Baskerville Hall. While Hugo feasted and drank below, the girl escaped down an ivy vine and fled across the dark moor toward her father’s farm nine miles away.
Enraged, Hugo unleashed his hunting hounds and galloped into the darkness. Hours later, his terrified companions discovered the dead horses and found the hounds whimpering at the edge of a deep ravine. Approaching the gully, they witnessed a horrific apparition:
“There in the moonlight lay the unhappy maiden, dead of fear and fatigue. But it was not upon her body that the eyes of these three roisterers were fixed… Standing over Hugo, and plucking at his throat, there was a foul thing, a great, black beast, shaped like a hound, yet larger than any hound that ever mortal eye had rested upon.”
The demonic beast tore Hugo’s throat out before their eyes and vanished into the night. Since that fateful night, the manuscript warns, sudden and violent deaths have haunted the Baskerville descendants.
The Death of Sir Charles
Mortimer then reads a newspaper clipping detailing the recent death of Sir Charles Baskerville. Sir Charles, a philanthropic gentleman who made a massive fortune in South African gold mines, lived in terror of the legend. On the night of May 4, Sir Charles took his customary evening walk down the Yew Alley of Baskerville Hall. He stopped at the wicket-gate leading onto the moor for roughly ten minutes, then apparently ran down the path in a frenzy of terror before collapsing dead of heart failure.
Mortimer leans across the table and whispers the terrifying detail he withheld from the coroner:
“Mr. Holmes, they were the footprints of a gigantic hound!”
🐾 Chapter 3: The Problem
Dr. Mortimer elaborates on the forensic clues. Sir Charles was standing at the wicket-gate smoking a cigar (indicated by fallen ash) and appeared to walk on his tiptoes down the alley. Holmes immediately corrects Mortimer: Sir Charles was not walking on tiptoes—he was running for his life in blind panic!
Furthermore, local peasants and moorland farmers have reported seeing a monstrous, luminous hound roaming the bogs at night, howling across the tors.
Mortimer explains his true dilemma: Sir Charles’s vast estate (worth roughly a million pounds) passes to his only surviving nephew, Sir Henry Baskerville, who is arriving in London that very day from farming in Canada. Mortimer fears that if Sir Henry takes up residence at Baskerville Hall, the family curse will claim him as well.
Holmes promises to investigate. He spends the remainder of the day wrapped in his dressing gown, smoking strong black shag tobacco in a room thick with blue smoke, studying a large Ordnance survey map of Dartmoor to master its hills, mires, and hamlets.
✉️ Chapter 4: Sir Henry Baskerville
The following morning, Mortimer brings Sir Henry Baskerville to Baker Street. Sir Henry is a fiery, energetic, dark-eyed young man of thirty.
Before Mortimer can speak, Sir Henry announces a mystery: upon checking into the Northumberland Hotel that morning, he received a mysterious anonymous letter:
“If you value your life or your reason keep away from the moor.”
The words were formed by printed text cut out of a newspaper—which Holmes instantly identifies as that morning’s Times lead editorial, cut with short-bladed nail scissors.
Furthermore, Sir Henry complains of an absurd petty theft: he placed a brand-new pair of brown dress boots outside his hotel door to be polished, and one boot was stolen.
After Mortimer and Sir Henry leave Baker Street, Holmes and Watson immediately shadow them down Regent Street. Spotting a hansom cab following Sir Henry, Holmes catches the eye of the passenger inside: a square-jawed man with a bushy black beard. The passenger orders the cabman to whip the horse, escaping into traffic. Holmes notes the cab number: #2704.
🧵 Chapter 5: Three Broken Threads
Holmes attempts to track the three clues (“threads”), but each snaps:
- The Cab: Holmes summons the driver of cab #2704, John Clayton. Clayton reveals that his fare claimed to be a detective named Sherlock Holmes—proving the mastermind possesses arrogant, mocking audacity.
- The Newspaper Cutouts: Holmes sends Cartwright, a street-smart messenger boy, to search wastepaper baskets in 23 hotels near Charing Cross to find the cut-up copy of The Times, but Cartwright finds nothing.
- The Stolen Boot: Visiting Sir Henry at his hotel, they discover that while the new brown boot is still missing, an old, worn black boot has now been stolen from his room. Holmes is delighted: the thief realized that a new, unworn boot had no scent, and stole an old boot so a hound could track Sir Henry’s personal scent!
Because Holmes must remain in London to attend to pressing financial cases, he insists that Dr. Watson accompany Sir Henry to Dartmoor as an armed bodyguard and independent investigator, reporting all observations back to Baker Street in daily letters.
🏰 Chapter 6: Baskerville Hall
Sir Henry, Watson, and Mortimer travel by train to Devonshire. Arriving at the edge of Dartmoor, they find armed soldiers patrolling the roads. The coachman explains that Selden, the notorious Notting Hill murderer, escaped three days ago from the nearby Princetown prison and is believed to be hiding in the desolate bogs.
The landscape shifts from lush Devon pastures to bleak, brooding moorland dominated by granite tors (jagged granite peaks).
Arriving at Baskerville Hall, they enter an ancient, gloomy manor shaded by dark yew trees. They are greeted by the butler, John Barrymore, and his wife, Eliza. Barrymore possesses a full, square black beard—the exact physical feature of the mysterious man in the London cab!
That night, lying awake in the cold, echoing manor, Watson hears a chilling sound in the dead silence: the muffled, heartbroken sobbing of a woman weeping in torment.
🌿 Chapter 7: The Stapletons of Merripit House
The next morning, Watson confronts Barrymore about the weeping woman. Barrymore uncomfortably denies it, but Watson notices that Mrs. Barrymore’s eyes are red and swollen from crying.
Walking across the moor to the village of Grimpen, Watson meets Jack Stapleton, a cheerful, energetic naturalist carrying a butterfly net. Stapleton lives at nearby Merripit House with his sister, Beryl Stapleton, a woman of breathtaking, dark foreign beauty.
Stapleton points across the moor to the Great Grimpen Mire—a vast, green, treacherous bog where a false step plunges horses and men into bottomless mud:
“That is the Great Grimpen Mire,” said he. “A false step yonder means death to man or beast. Only yesterday I saw one of the moor ponies wander into it. He never came out. I saw his head for quite a long time craning out of the bog, but it sucked him down at last.”
Suddenly, a long, low, terrifying howl reverberates across the moor. Stapleton casually attributes the sound to a rare bittern bird or the mud settling, but Watson feels a cold shudder of supernatural dread.
When Stapleton darts off to chase an insect, Beryl Stapleton rushes up to Watson, mistaking him for Sir Henry:
“Go back!” she whispered passionately. “Go straight back to London, instantly! I cannot tell you why, but for God’s sake do what I ask you! Go back and never set foot upon the moor again!”
When her brother returns, she falls abruptly silent. Later, realizing Watson is only a guest, she secretly meets him on the path, begging him to deliver her warning to Sir Henry without telling her brother.
🕯️ Chapter 8: First Report of Dr. Watson
Chapter 8 is framed as Watson’s first formal intelligence dispatch to Holmes.
Watson reports that Sir Henry has fallen deeply in love with Beryl Stapleton, but Jack Stapleton displays bizarre, furious jealousy whenever Sir Henry attempts to court her. Watson also introduces another colorful neighbor: Mr. Frankland of Lafter Hall, an elderly, eccentric retired gentleman obsessed with fighting expensive legal lawsuits and scanning the moor through a powerful telescope mounted on his roof.
The central mystery deepens around the butler, Barrymore. At two o’clock in the morning, Watson is awakened by stealthy footsteps outside his room. Peering into the corridor, Watson spots Barrymore creeping to a window in the west wing, holding a candle to the glass, and staring intently into the blackness of the moor as if signaling to someone outside.
🪨 Chapter 9: The Light upon the Moor
Watson confides Barrymore’s suspicious behavior to Sir Henry. Together, they stage a midnight stakeout.
Late the next night, they catch Barrymore at the window. When Sir Henry furiously demands an explanation, Mrs. Barrymore bursts into the room weeping and confesses the secret:
- The escaped convict hiding on the moor, Selden, is her younger brother.
- She spoiled him as a boy, and when he became a vicious criminal, she could not let him starve in the cold.
- The candle was a signal to Selden; when he flashed a light in response, Barrymore would carry food and warm clothes out to the rocks.
Sir Henry and Watson arm themselves with revolvers and head out onto the black moor to capture Selden. In the moonlight, they spot the gaunt, wild convict illuminated by a candle perched on a granite tor.
Selden hurls a heavy rock at them and flees with the agility of a mountain goat. As Watson fires a shot into the darkness, a blood-freezing sight catches his eye:
Standing atop the jagged Black Tor, silhouetted against the bright face of the moon, is the tall, thin figure of an unknown man with his arms folded across his chest. Before Watson can approach, the figure vanishes into the night.
📜 Chapter 10: Extract from the Diary of Dr. Watson
The following morning, Barrymore thanks Sir Henry for agreeing not to inform the police about Selden, explaining that Selden’s friends are arranging a boat to smuggle him to South America.
In return, Barrymore reveals a vital clue he discovered in the fireplace of the Yew Alley: on the night Sir Charles died, he was waiting to meet a woman. Barrymore found the charred fragment of a burned letter:
“Please, please, as you are a gentleman, burn this letter, and be at the gate by ten o’clock. — L.L.”
Dr. Mortimer identifies “L.L.” as Laura Lyons, Mr. Frankland’s estranged daughter who lives in the nearby town of Coombe Tracey. Laura had married an artist who abandoned her, and Sir Charles had charitably provided financial support to set up her typing business.
Barrymore also mentions that Selden saw the mysterious stranger on the moor: the man lives in one of the prehistoric stone huts on the tor, and a young boy brings him food and supplies every day.
🛖 Chapter 11: The Man on the Tor
Watson travels to Coombe Tracey to interview Laura Lyons. She admits that she wrote the letter begging Sir Charles for financial help to secure a legal divorce, but claims that someone else came to her aid at the last moment, causing her to miss the midnight appointment.
Returning to the moor, Watson encounters Mr. Frankland, who gleefully boasts that he has tracked the convict’s child messenger through his roof telescope, spotting a young boy carrying a basket into the Neolithic stone dwellings on the high tor.
Watson races to the abandoned stone hut. Inside, he finds signs of habitation: a bed of heather blankets, empty tins of tongue, and a note written in pencil listing Watson’s own movements!
Revolver in hand, Watson waits inside the dark hut until footsteps approach. A shadow falls across the doorway, and a cool, familiar voice speaks:
“It is a lovely evening, my dear Watson. I really think that you will be more comfortable outside than in.”
It is Sherlock Holmes!
🩸 Chapter 12: Death on the Moor
Holmes explains that he deliberately concealed his presence on the moor so that his movements would not alert the mastermind, using the messenger boy Cartwright to bring food from the village.
Holmes and Watson piece together the astonishing truth:
- Jack Stapleton is the killer. Beryl Stapleton is not his sister, but his legal wife, whom he forces to masquerade as an unmarried woman to manipulate male admirers.
- Stapleton seduced Laura Lyons, promised to marry her once her divorce was finalized, and coerced her into writing the midnight meeting letter to Sir Charles.
- Stapleton then kept Laura from attending, brought the hound to the gate himself, and unleashed it on the terrified, ailing old gentleman.
Suddenly, a blood-curdling human scream of agonizing terror echoes across the moor, followed by the deep, resonant baying of an enormous beast!
Holmes and Watson rush across the dark heather toward the sound. At the base of a sharp granite cliff, they find a man’s body lying broken on the stones, his neck snapped.
Seeing the ruddy beard and tweed clothing, Holmes weeps in grief, believing Sir Henry has been killed. But turning the corpse over, they discover it is Selden, the escaped convict!
Barrymore had given Sir Henry’s cast-off clothes to Selden. The hound had tracked Sir Henry’s personal scent from the old black boot stolen in London, hunting Selden down by mistake.
As they stand over the corpse, Jack Stapleton strolls out of the darkness with a smile, feigning astonishment at the dead convict. Holmes coolly hides his discoveries, claiming that he will return to London the following morning.
🎨 Chapter 13: Fixing the Nets
Back at Baskerville Hall, Holmes and Watson dine with Sir Henry. During dinner, Holmes glances up at the row of ancestral Baskerville portraits lining the banquet hall.
Covering the long curly wig and cavalier costume of the wicked Hugo Baskerville with his hands, Holmes reveals the physical face beneath: it is an exact, unmistakable likeness of Jack Stapleton!
Stapleton is an unknown Baskerville heir seeking to exterminate the family line to inherit the million-pound fortune.
Holmes instructs Sir Henry to accept Stapleton’s dinner invitation at Merripit House the following evening. Crucially, Holmes insists that Sir Henry must walk home across the dark moor alone at night, serving as the bait to catch Stapleton in the act.
Holmes and Watson openly depart for the railway station, telling everyone they are returning to London. Instead, they meet Inspector Lestrade of Scotland Yard, who has arrived with an arrest warrant.
Before setting the midnight trap, Holmes visits Laura Lyons in Coombe Tracey. When Holmes reveals that Beryl is Stapleton’s legal wife, Laura is furious at Stapleton’s deceit and confesses that Stapleton persuaded her to arrange the midnight meeting with Sir Charles and forbade her from attending.
🐾 Chapter 14: The Hound of the Baskervilles
That night, Holmes, Watson, and Lestrade take up positions behind the rocks near Merripit House, waiting for Sir Henry to finish dinner. A thick, white ground fog begins rolling in from the Great Grimpen Mire, threatening to blind the detectives.
Sir Henry steps out of Merripit House and begins walking down the track across the moor.
Suddenly, from the heart of the creeping fog bank, an unspeakable nightmare erupts:
“A hound it was, an enormous coal-black hound, but not such a hound as mortal eyes have ever seen. Fire burst from its open mouth, its eyes glowed with a smouldering flame, its muzzle and hackles and dewlap were outlined in flickering flame. Never in the delirious dream of a disordered brain could anything more savage, more appalling, more hellish be conceived than that dark form and savage face which broke upon us out of the wall of fog.”
Lestrade shrieked and fell flat on his face with terror. Holmes and Watson fire their revolvers, but the beast bounds past them, lunging at Sir Henry’s throat and knocking him to the earth!
Holmes sprints forward with superhuman speed and empties five bullets into the monster’s flank. The beast howls in agony, rolls onto its back, and dies.
Holmes touches the glowing muzzle: his fingers shine with blue, eerie fire in the dark. The beast is a massive bloodhound-mastiff hybrid coated in an odorless preparation of phosphorus!
The detectives rush into Merripit House to arrest Stapleton. Upstairs in a locked room, they find Beryl Stapleton tied to a wooden pillar, gagged, bruised, and whipped. Freeing her, she reveals that Stapleton has fled into the Great Grimpen Mire to his secret lair on the island of the bog.
The following morning, guided by Beryl, Holmes and Watson track Stapleton into the mire. In the middle of the black swamp, they recover Sir Henry’s stolen brown boot used to train the dog. But Stapleton’s footprints end abruptly in the mud: blinded by the dense fog, he missed his path and was sucked down into the bottomless mire, drowning in the foul mud.
🕯️ Chapter 15: A Retrospection
Months later, sitting by the fire at 221B Baker Street, Holmes reconstructs the complete case for Watson:
- Stapleton’s Identity: He was actually Rodger Baskerville, the son of Sir Charles’s younger brother who had fled to South America. After stealing public funds in Costa Rica, he married Beryl Garcia and moved to England, running a school in Yorkshire under the name Vandeleur.
- The Conspiracy: When the school collapsed, he discovered that only two lives stood between him and the Baskerville fortune: Sir Charles and Sir Henry.
- The Execution: Learning of Sir Charles’s heart condition and the family legend, he bought the ferocious hound in London, housed it in the mire, and covered it in phosphorus. He used Laura Lyons to lure Sir Charles to the gate, where the sight of the demon hound caused Sir Charles to die of fright.
- London Surveillance: Stapleton trailed Sir Henry in London (wearing a false beard), stole the old boot to give the hound a scent, and attempted the final murder at Merripit House.
With Stapleton dead, Sir Henry recovers from his nervous shock by taking a worldwide voyage with Dr. Mortimer, while Holmes invites Watson to join him for an evening at the opera to celebrate their victory.
Experience the definitive Gothic mystery with Victorian notes. The DodaBooks Annotated Edition includes Dartmoor maps, folklore essays on the Devon phantom hound, and original Sidney Paget illustrations.
Get the Annotated Edition at DodaBooks📊 Suspects, Motives, and Red Herrings Matrix
| Character | Apparent Suspicion | Motive / Red Herring | Reality / Truth |
|---|---|---|---|
| John Barrymore | Wanders the house at 2:00 AM holding candles; bushy black beard matches London cab passenger. | Inherits £500 from Sir Charles’s will; acts secretively. | Innocent; was signaling and smuggling food to his brother-in-law Selden on the moor. |
| Selden (Convict) | Violent escaped murderer lurking on the moor; seen near Baskerville Hall. | Terrifying physical threat; armed and desperate. | Red herring; was wearing Sir Henry’s cast-off clothes and was hunted down by the hound by mistake. |
| Mr. Frankland | Constantly scanning the moor with telescope; aggressive legal lawsuits. | Bizarre eccentric behavior; knows moor secrets. | Harmless busybody whose amateur astronomy inadvertently helps Watson find Holmes. |
| Laura Lyons | Wrote desperate meeting letter to Sir Charles demanding he burn it. | Needed financial aid for divorce; suspected accomplice. | Innocent pawn seduced and deceived by Stapleton’s false promise of marriage. |
| Jack Stapleton | Mild-mannered naturalist chasing butterflies with a net. | Claims to be an impartial neighbor; displays extreme jealousy over sister. | The Mastermind: Secret Baskerville heir who trained the phosphorus-coated hound to inherit the estate. |
❓ Frequently Asked Questions
Why did Sherlock Holmes stay hidden on Dartmoor instead of staying at Baskerville Hall?
Holmes knew that if the mastermind realized the world's greatest detective was watching his every move, the killer would never strike. By pretending to remain in London and letting Watson operate openly, Holmes drew the killer into a false sense of security while maintaining complete operational freedom to observe suspects from his secret hut on the tor.
How did Stapleton make the hound glow in the dark without killing it?
Stapleton used a special, odorless chemical preparation of phosphorus. Natural white phosphorus is toxic and combustible, but Stapleton created a non-irritating, glow-in-the-dark mixture that would not burn the animal’s skin or dull its scent-tracking abilities during the hunt.
Is Dartmoor and the Great Grimpen Mire real?
Dartmoor is an actual, breathtaking national park in Devon, England, famous for its granite tors, prehistoric Bronze Age stone huts, and dangerous peat bogs. The "Great Grimpen Mire" was based directly on Dartmoor’s real-life Fox Tor Mire, a treacherous peat swamp where animals and travelers have historically vanished into bottomless mud.
Who was the real-life inspiration for Hugo Baskerville?
Conan Doyle was inspired by the Devonshire folklore of Richard Cabell of Brook Hall, a notoriously cruel 17th-century squire rumored to have sold his soul to the devil. When Cabell died in 1677, local legend claimed a pack of phantom black hounds gathered howling around his tomb, which remains enclosed in a heavy iron cage in Buckfastleigh to prevent his ghost from escaping.
Why is Dr. Watson so prominent in this novel?
Because Holmes remains in hiding for Chapters 6 through 11, Dr. Watson carries the entire middle third of the novel. Watson operates as an armed, intelligent, and highly capable field investigator, conducting interviews, staking out Barrymore, and navigating the treacherous moor on his own, making this novel Watson’s finest hour in the canon.
📚 Related Reading Guides
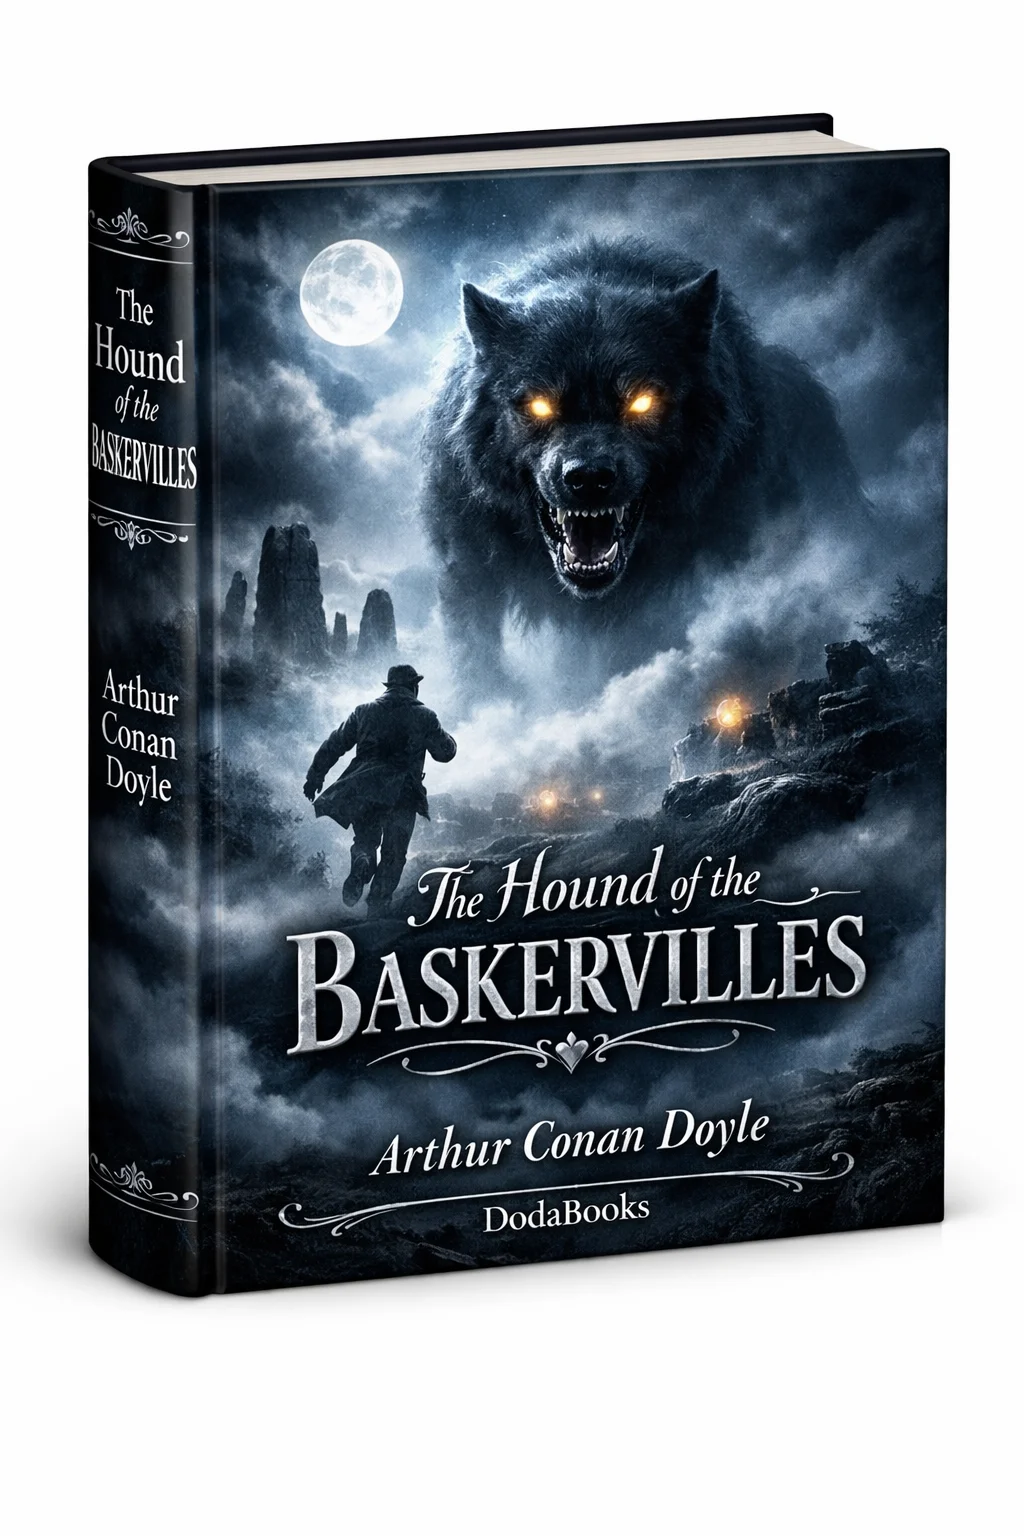
Conquer Dartmoor with Total Clarity
Read Arthur Conan Doyle's greatest masterpiece in the definitive DodaBooks Annotated Edition:
- Complete 15-chapter authorial text of the 1902 novel
- Explanatory notes detailing Dartmoor geography, Fox Tor Mire, and Devonshire folklore
- Forensic science breakdowns of the phosphorus hound and footprint analysis
- Instant digital download formatted for Kindle, iPad, Kobo, and phone